Category Archives: Robotics

Mostly Vex and Mindstorms.

Black Friday Thru Cyber Monday Sale

Today thru Monday only…

10% off all Mindsensors products
10% off all custom aluminum parts (sets included)

Plus..

Buy US$60 of custom aluminum parts or sets and receive a FREE 25L Aluminum Liftarm.

Buy over US$350 of custom aluminum parts or sets and you also receive a FREE Screw On Kit ($59.99 value).

Plus..
Domestic Orders over US$50 receive free shipping.
International Orders over US$100 receive US$4 off shipping per US$100 spent.

TERMS AND CONDITIONS

These discounts and special offers begin the moment you read this post and end at 11:59 PM Eastern Standard Time on November 29th, 2010.

For orders paid by Paypal, discounts will be sent as a Paypal refund the day the order ships. I wish I could reflect the discount at the point of sale but because the Paypal shopping cart doesn’t allow me to add discount codes or make these types of shipping calculations, I’m only able to offer the discount as a type of rebate. The good news is that you need to do nothing to claim your discount. I will issue it automatically upon shipment of the order. You don’t have to worry about forms, 4-6 week delays, or any other rebate shenanigans typical with big box retailers.

If you prefer to receive your discount with the order, please EMAIL your order to me at bill@inanimatereason.com. Emails must be received by 11:59 PM Eastern Standard Time on November 29th, 2010. I will send an invoice through Paypal reflecting the correct price. To qualify for the discount, orders must be paid within 24 hours of being invoiced. I am not responsible for lost or misdirected email.

For orders paid by other methods, your discount will be offered in the same manner as your form of payment.

Payments sent through the mail must be postmarked by November 29th to qualify for the sale.

Mindsensors orders are subject to availability from the manufacturer. Items no longer available from the manufacturer will be fully refunded. If an item can’t be delivered by Christmas, I will offer a full refund for that item.

Enjoy!

July Promotion and Contest

We’re back with new promotions for July! Every order with $100 or more in custom aluminum parts or sets gets a free 25L Liftarm!

JULY CONTEST
Place the largest order of custom aluminum parts and/or sets in our store between July 10 and July 31, 2010 and receive a free Aluminum Screw-On Kit! This recently updated kit sports 16 custom pieces with a combination of Technic®-standard and threaded holes. We include plenty of hardware to allow you to fasten your creations together for extra strength and structural integrity.
Screw On Kit Assembly example Screw On Kit Assembly contents

Come see us at Brickworld (sort of) :)

Brickworld starts tomorrow in Chicago! I’m actually NOT going to Brickworld. As much as I would like to, time and family commitments keep me from making the trip this year. However, Inanimate Reason is sponsoring the event at the Red Plate Level. Our sponsorship comes from donating three lots to the Esther Walner Charity Auction being held on Saturday night. The auction is held to support Make-A-Wish, Toys-4-Tots and InSciTe Illinois (a FIRST LEGO League managing partner). The auction is always a highlight of the Brickworld experience.

100% of your bid goes to the charities involved. If you’re attending, think of the children and bid generously. 🙂 Here is what to look out for from Inanimate Reason:

Also for Brickworld, we are having a special promotion! Look for special cards in all the goody bags from us. On these cards, you’ll see a special coupon code. Since the default Paypal cart we’re using doesn’t have any convenient way to redeem coupons or add freebies to your order, please use our contact feature, select redeem coupon as the topic, write in your coupon code and send it in. We’ll match it up to your order and you’ll get the gift along with your shipment.

We are now a Mindsensors Authorized Dealer!

We are now an authorized seller of the full line of Mindsensors products! Expand your LEGO™ Mindstorms™ robots with some of the best electronics on the market today!

All our Mindsensors’ products are brand new and fully warranted through Mindsensors. If you are building the next big destructo-bot or even something more modest like a little sumobot, these high-precision sensors, controllers, and multiplexers give you plenty of options beyond the basic NXT sensor and motor options.

The 8 channel Servo Controller lets you control standard hobby servos like the Hitec HS-645MG Ultra Torque Servo and the Hitec HS-805BB MEGA 1/4 Scale Servo. Don’t forget the Servo Attachment Kit.

Or, control your PF motors with the PFMate. It lets you control speed, direction and braking/floating on PF motors from your Mindstorms NXT.

We’re also stocking sensor multiplexers for RCX sensors allowing you to connect up to four to a single NXT port.

We’re working to build the best stock of LEGO compatible products to let you build better, stronger, and faster! Feel free to send your comments and suggestions. If you have custom needs or want to special order items we don’t have in stock
yet so that you can have it all shipped together, please let us know.

Servo Integration for a Happy New Year

Happy New Year everyone!

I’m pleased to announce several new products but I’m saving the best for last!

First, we are going to begin stocking our most popular items in both unanodized and black anodized aluminum. You can request any aluminum part be anodized at no charge, but if we stock it, you don’t have to wait! Today, I added 23L and the 5×3 T Liftarms in black anodized to my store.
5x3 T Liftarm23L Anodized Liftarm

We also expanded our liftarm line to include a 4L aluminum liftarm. That’s as small as we’ll get for standard liftarms since TLG already makes and sells the 2L liftarm.
4L Standard Liftarm

We’ve also developed a 3×3 L-shaped liftarm with tapped connection holes on the ends and corner. The remaining two holes are standard Technic holes for use with any standard Technic pin or our steel anti-rotation pins. The tapped holes fit standard 10/24 cap screws.
3x3 L shaped Liftarm with three holes tapped

The Long Awaited Servo Integration Kit!

Contents of the Servo Integration Kit

Our servo adapter kit lets you power your MOCs using standard hobby servos. It provides LEGO standard attachment points for both the housing and the servo horn. The kit works with many popular Futaba and Hitec standard size servos.

LEGO Beams attached to a Hitec HS-645MG Servo
Imagine powering your robot or vehicle using a motor with 7x the stall torque of a LEGO XL Motor! Of course, the kit works equally well with most other standard sized Futaba and Hitec servos. Our servo connection plate can adapt to Lego plastic axles or 3/16 steel axles (one 4L sized axle of each material is included. We include set screws for both types of axle.

The plate also features integrated mount points for LEGO liftarms and our custom aluminum liftarms.

You can also attach our custom liftarms or other Technic® compatible elements to the face of our proprietary horn. The horn is designed to mount to either Futaba or Hitec servos (or other brands who conform to their designs). Our unique horn design gives you the option to use either size standard without having to worry about which horn or servo you happen to have available.

Drive Train Tutorial Using The New Miter Gear Set

I’ve been playing with our new Miter Gear Set for a little while now and I can’t believe how easy it is to build a drive train! Following is a short picture tutorial on how I did just that.

Step 1 Using the miter gear box, the middle size steel axle, and one of the miter gears, insert the axle through the gear box and one of the miter gears. Once the axle is centered, lock the miter gear onto the axle by tightening the set screw on the side of the gear. I chose the middle axle size so that my wheelbase would match the other end of my vehicle using a 15L liftarm. If you wanted to use the drive train with the Crossover 19L Aluminum Liftarms for your steering mechanism, the longer axle would be the better choice.

Step 2 Take the second miter gear and slide it into place where it mates with the first gear and then insert the short axle into the top of the gear box. Once it is fully inserted into the miter gear, lock it down as well. Here is the finished result from steps 1 and 2:

Step 3 Attach the wheel hubs to the ends of the drive axle. These wheel hubs are made to be used with any LEGO wheels that support the triple pin connection. In this tutorial, I happen to be using the 62mm wheels from the Silver Champion Formula Racer. 🙂 This is what the wheel looks like with and without the hub:

And this is the assembly with the hubs on the axles.

Step 4 Attach the wheels to the hub. The hubs can be attached to the wheel using standard LEGO pins or they can be through-bolted using the included 10-24 cap screws.

Step 5 Attach the gear hub to either a 24 or 40 tooth LEGO gear. A 24 tooth gear is included in the set. This assembly will drive the wheels through the miter gears. Attach the assembly to the drive shaft locking it down to the axle with an allen wrench. Here is your final assembly.

Overall, it took about 10 minutes to put it all together. It would have been less, but I had to find the wheels. Below, I’m including another example build displaying an entire vehicle frame made with the gear kit and a mix of LEGO and aluminum elements from our shop. The drive shaft is being power by two Large Power Functions Motors. You may notice the gear box is slightly different. This was an earlier prototype. The new gearbox included with the miter gear kit is designed to be sealable to protect it from dirt and grime outdoors.

Play well!

My New Robotics and RC Store

For the last few months, I’ve been reselling some fantastic elements that supplement and enhance my Mindstorms project activities. These elements are made to work with any LEGO® Technic® compatible sets. What really makes them interesting is that they are made from aluminum instead of plastic. All the elements are designed in shapes not available through LEGO. I’ve been selling these parts through my Bricklink store. So far, it’s gone pretty well but I’m having a hard time finding potential buyers. The only real way to promote these on Bricklink is through the Bricklink Forum. I think about 5% of the people who use Bricklink actually visit the forum. Because these elements are custom, they are not tied to the extensive catalog of LEGO parts in Bricklink’s database. Consequently, they will never show up in a search on Bricklink. Other than linking from my occasional forum posts (I try not to be spammy), you have to know they exist and understand how to navigate the site to find them.

Because of this limitation and the little detail that Bricklink is intended for sales only of LEGO-related items, I’ve decided to setup my own store to further promote these great products. Right now, with just the liftarms, everything fits just fine within Bricklink’s guidelines. However, as the product line expands, the elements and kits we intend to produce will become less LEGO dependent and more of a crossover product. Our goal is to let you use your existing LEGO pieces, particularly Technic and Mindstorms and go far beyond what you could accomplish using LEGO alone. By extending their exceptionally flexible system, we will let you integrate more traditional RC and robotics components into your creations.

The product roadmap is fairly straight-forward but ambitious. LEGO liftarms are predominantly made in odd numbered sizes up to 15 holes (or studs-it’s essentially the same metric). Our straight liftarms range in length up to 25 studs and in even numbers down to 6 studs in length. Having the larger sizes lets you create larger structures without the need to bridge as often. By using a single, aluminum beam, you’ll have far stronger frames with fewer weak points. We’re also producing a number of angled and T-shaped beams to extend your building options.

Another unique feature is the offset holes. In a traditional liftarm, the holes are equally spaced the length of the beam. On a number of our designs, holes, or groups of holes are offset by 50% from the adjoining hole. This lets you create gearing trains with ratios not otherwise possible. On a traditional beam, you can mate the 8, 24 and 48 tooth gears fairly easily since their center holes align conveniently with the standard hole spacing. However, if you want to mate any of these gears with LEGO’s 16 tooth gear, the teeth won’t mesh without introducing a lot of complexity and building your gear train into a second dimension. Using our beams with the offset holes, you can make any combination of gears work. In the example below, a 16 tooth gear is sandwiched between an 24 and a 48 tooth gear allowing both outer gears to turn in the same direction.
Example of gearing using offset holes

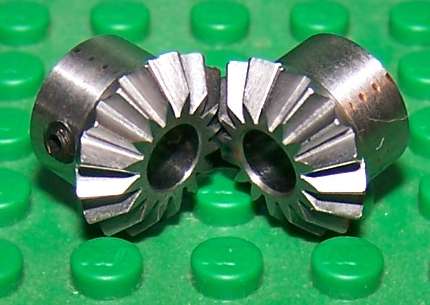
Getting back to new product development, my manufacturer will soon release a steel gear and axle kit. There will be gears of 10, 30, and 50 teeth. There will be steel axles up to 38 studs long. This kit also has adapters to connect the steel axles directly to Lego 43 and 56mm rims allowing the usage of most LEGO Tires!

Additionally, ball bearing embedded liftarms will also be available separately to accommodate the higher torque. We will also offer adapters to use with Lego XL motors and higher torque motors like Futaba or HiTech. Of course, this will also facilitate integrating the RC industry’s remote controls and receivers. By providing this level of integration, remote control vehicles will be usable outdoors without the problems of limited range and infrared interference from the sun that LEGO IR controls have.

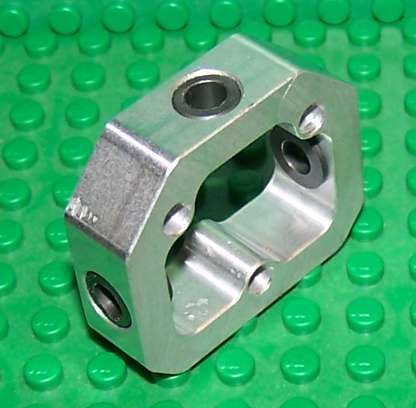
However, first you will see an aluminum “Screw-on” kit hit the shelves. This will logically precede the gear and axle kit so that customers can experiment with the solid screw-on connection between the aluminum liftarms already available in my store. This is something that steel gears and axles definitely need.

In case you haven’t noticed, I’m pretty excited about all of this! By marrying the flexibility of LEGO with the world of RC, I think we’ll have a system that gives unprecedented usability and offers a form of rapid prototyping for hardware that takes things far beyond the bounds of simple toys.

A LEGO Anemometer for fun

Where has the time gone?

I spent about 3 months collecting components and researching sensor designs for my weather station project. Sadly, after I collected what I needed, RL struck and they now sit in a box. 🙁

Just before the holidays, I found a portable weather station on clearance at Big Lots. I couldn’t pass it up for $20. It’s pretty much a toy, but it has been fun to play with! I thought I might hack it for the sensor parts and short cut my project, but I decided it would be better to use for calibrating my actual project. It just isn’t heavy duty enough for long term use.

A couple of weeks ago, I built a little anemometer using my LEGO Mindstorms NXT and some extra parts. I borrowed the initial design from a project on NXTLog. The original design had poor resolution because the light sensor only measured rotations in 180 degree increments. By using the RCX Rotation Sensor and a 1:5 gear ratio, my final resolution was 4.5 degrees. My simple gearing mates a 40 tooth driving gear with an 8 tooth gear. I originally attempted a complex gear train with a ratio of 1:15, but there was just too much friction and I couldn’t get it to spin below 6-7 MPH.

It came out pretty nice. I calibrated it using my toy anemometer and a box fan. I determined there are 32 increments per MPH. I left the light sensor on since it is completely passive and doesn’t interfere with the mechanism. This one isn’t suitable for the long term project, but it was a fun diversion.

Main pic

Anemometer side view

Closeup of moving parts

NXT Display while running

Weather Station Project

I’ve decided it would be fun to build a homebrew weather station.

I purchased a Lantronix Matchport Kit a few months ago from GridConnect. My original idea for an entry in the Lantronix Wireless Design Contest was a robotic watchdog that would wander around the house and record suspicious activity to a PC connected through a wireless LAN. However, I decided that the project was too ambiguous to tackle and shelved it.

This week, we had our first serious cold snap and I got to thinking about how cool it would be to know what the weather conditions were outside without having to actually go outside or login to an online weather site. My daughter and I had just finished planting some late season tomatoes and I was wishing I had some way to monitor the temperature since the forecast called for sub-freezing temps.

My mental ramblings brought my attention to some interesting sensors available for robotics hobbyists and I realized many of them could be adapted to building a weather station. After realizing the costs involved, I decided it would be more fun to build it all myself. Then I thought about how fun it would be to link it to Wunderground. Then I remembered the Matchport kit and figured this would be a cool project to implement wirelessly. Using solar power and a Wifi adapter, I could put the station anywhere and not have to deal with power or data connections. With commercially available personal weather stations running upwards of $1,000, I am pretty confident I can build this beasty for a fraction of the retail price.

The data logging interface to Wunderground is bonehead simple. It uses a simple Get Request posted to a webpage. I plan to build a data logger using a Parallax Basic Stamp 2 microcontroller and some home brew sensor circuits and designs for the input measurements.

For my initial design, I’ll tackle the basic six parameters addressed by commercial weather stations – wind direction and speed, temperature, humidity, pressure, and rainfall. Time permitting, I may work on a PC based app to interpret the incoming data for graphing and perhaps even alarm thresholds. If nothing else, it will be fun to try.